

Say a client sends you this: turn off these 14 ads, and change the link on all of them on Friday. Manage is the page in AdManage built for that kind of job. It looks like Ads Manager, with bulk tools on top.
Watch the walkthrough, or follow the steps below:
This tutorial covers five jobs:
- Turn off ads from a pasted list of names
- Change the link across many ads in Table Mode
- Save the change as a draft and schedule it
- Swap creatives on live ads, including by placement
- Transfer a campaign to another ad account
Every screenshot comes from AdManage's own Zapish Apps ad account.
Open Manage
Click Manage in the left-hand rail. You get your campaigns, ad sets and ads in tabs, with your metrics in the table.
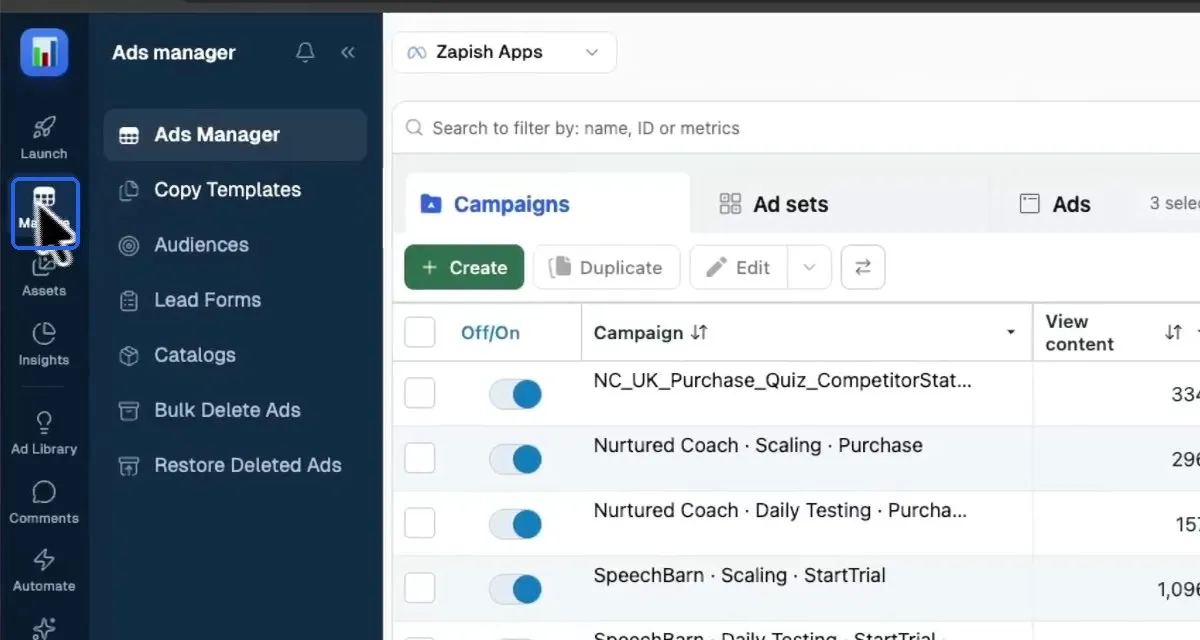
Most of what follows lives in the bulk actions menu: the small arrow next to the Edit button. Select at least one ad and the arrow opens a searchable list of actions.
1. Turn off ads from a list of names
Where: Ads tab, bulk actions arrow, Turn Off by names…
- Paste the ad names, one per line or separated by commas.
- Click Find ads.
- Check the three counts, then click Turn off.
AdManage checks your list against every ad in the current view before anything changes:
- Matched: these ads will be turned off. Each one is listed with its current status.
- Ambiguous: several ads share this name. These are skipped, so you never turn off the wrong one by accident.
- Not found: nothing has this exact name, which usually means a typo or an old name in the client's list.
Names have to match exactly, though capitals don't matter.
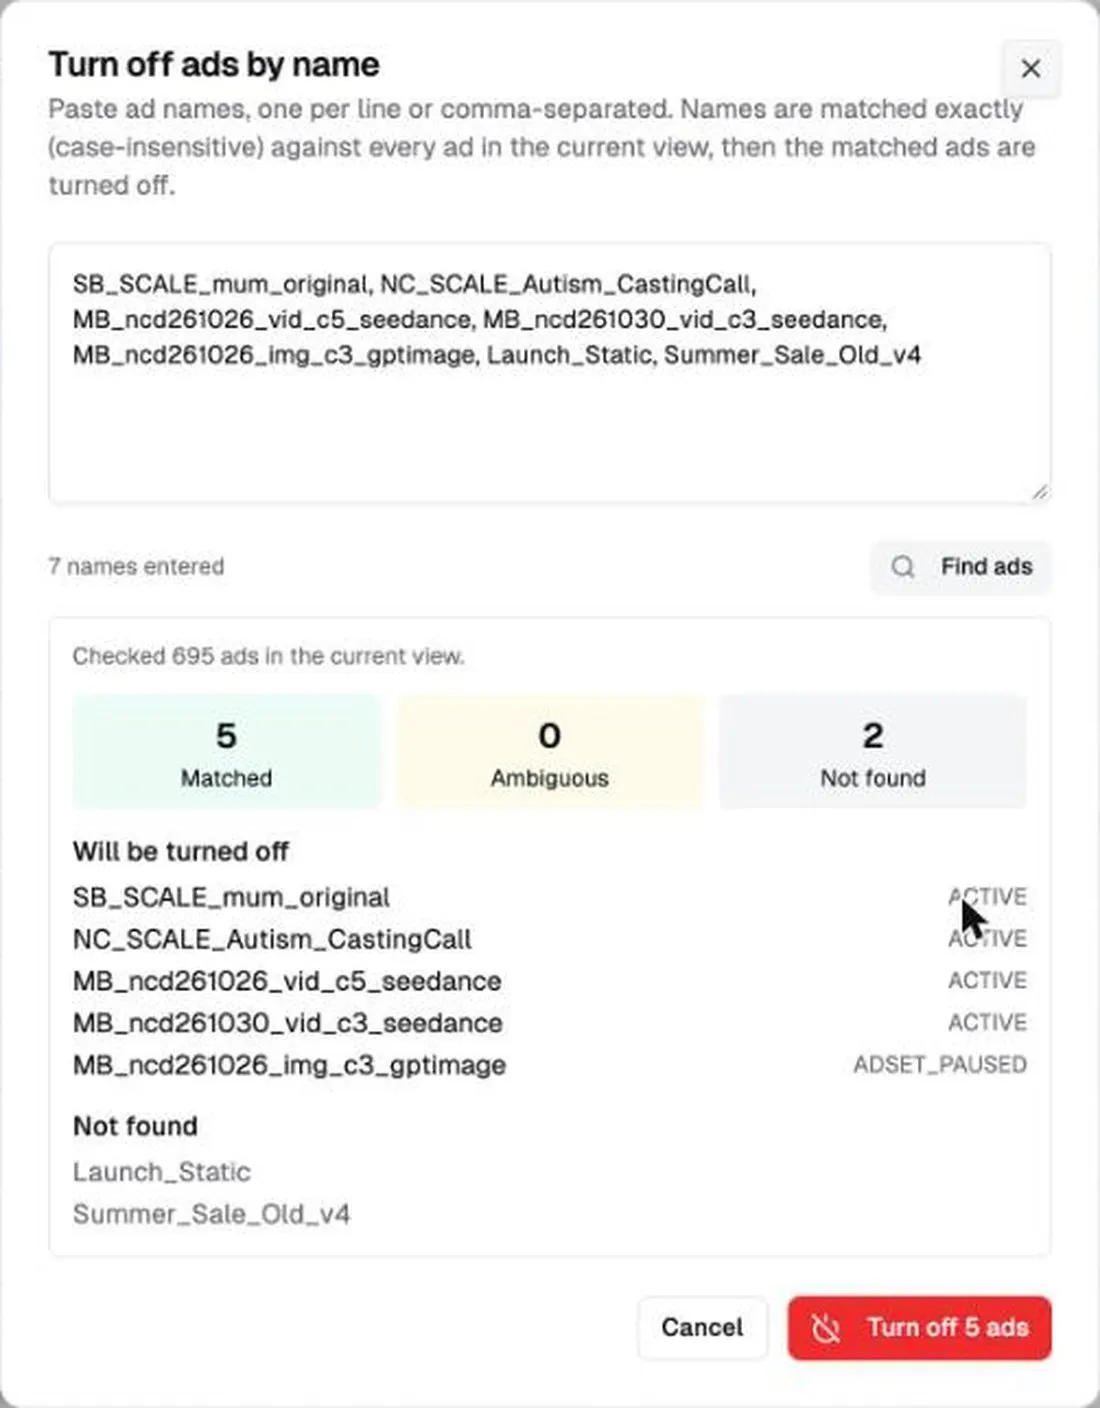
In this example the client's list had seven names. Five will be turned off, and the two not found go back to the client as a question. Nothing is off until you click the red button.
2. Change the link on every ad with Table Mode
Where: select your ads, bulk actions arrow, Edit in Table Mode
Start by ticking the ads you want to change.
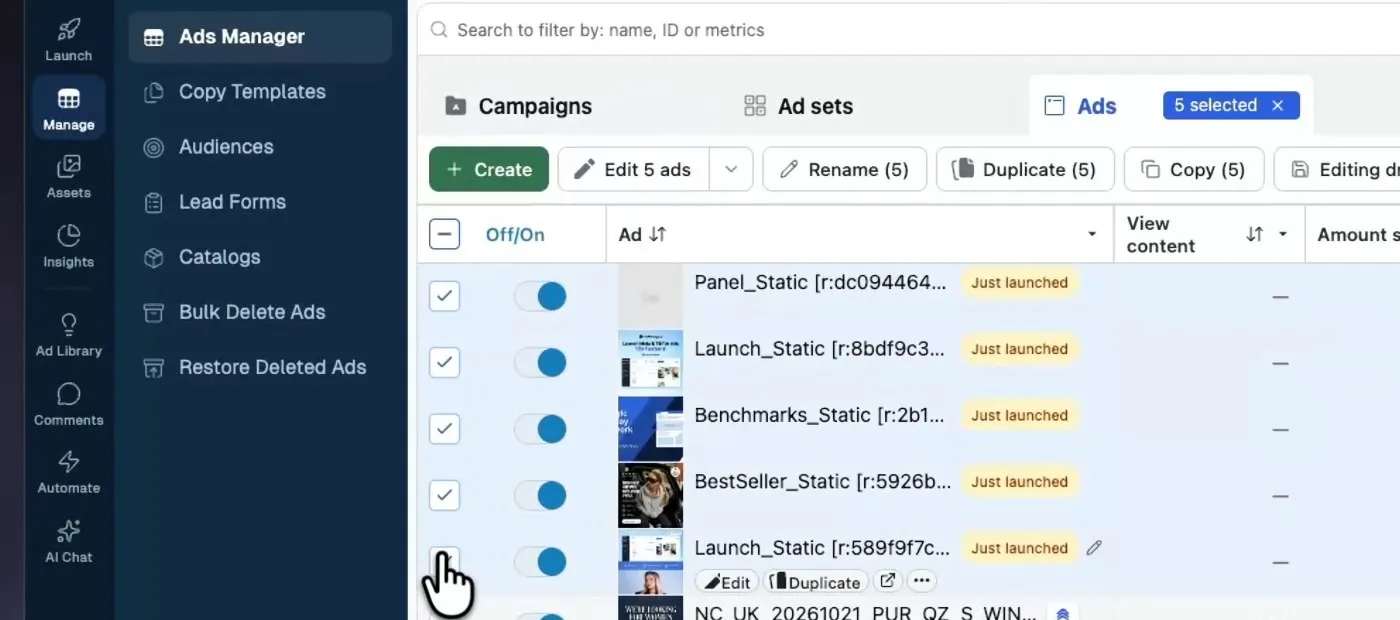
Then open Table Mode from the menu.
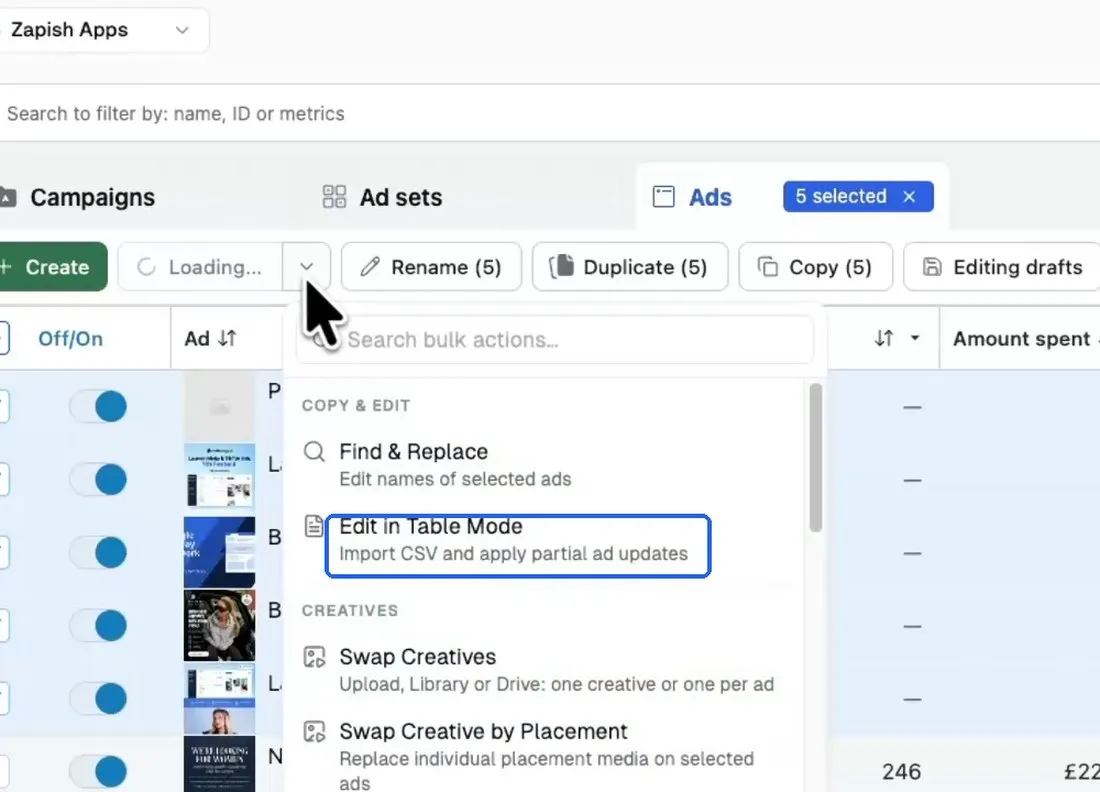
Your live ads turn into a spreadsheet. Names, up to five primary texts, headlines, URL, UTMs and CTAs each get a column you can edit.
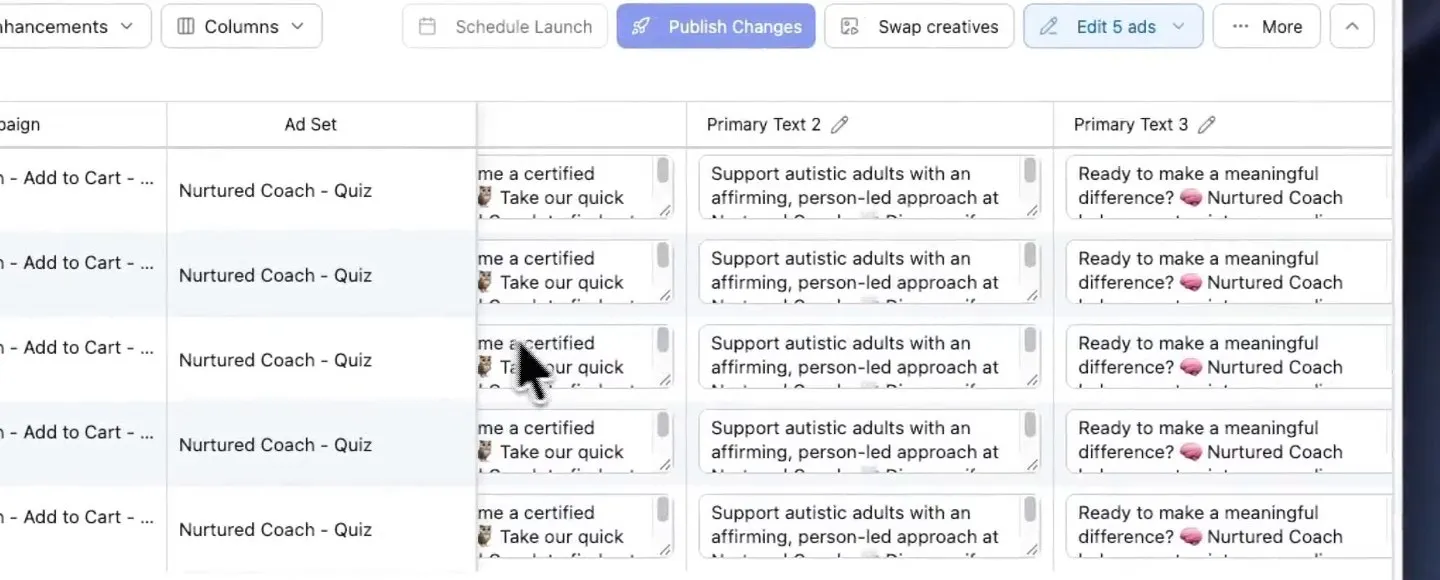
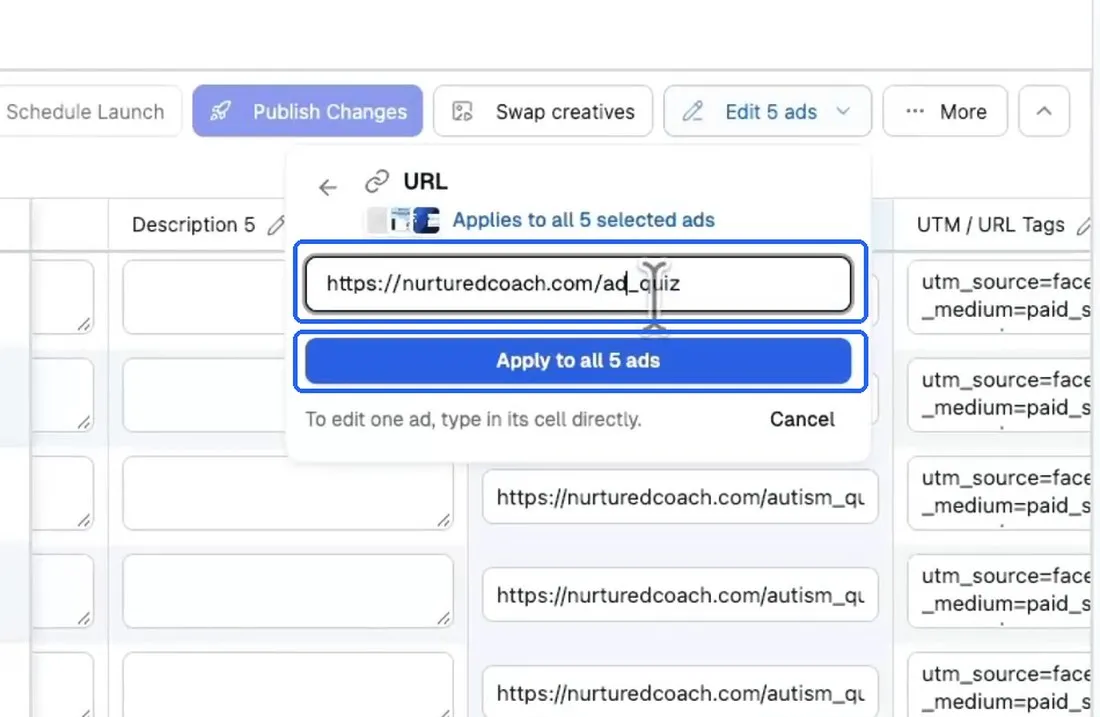
To change the link everywhere:
- Click the pencil on the URL column header.
- Edit the link. The panel confirms how many ads it applies to.
- Click Apply to all 5 ads.
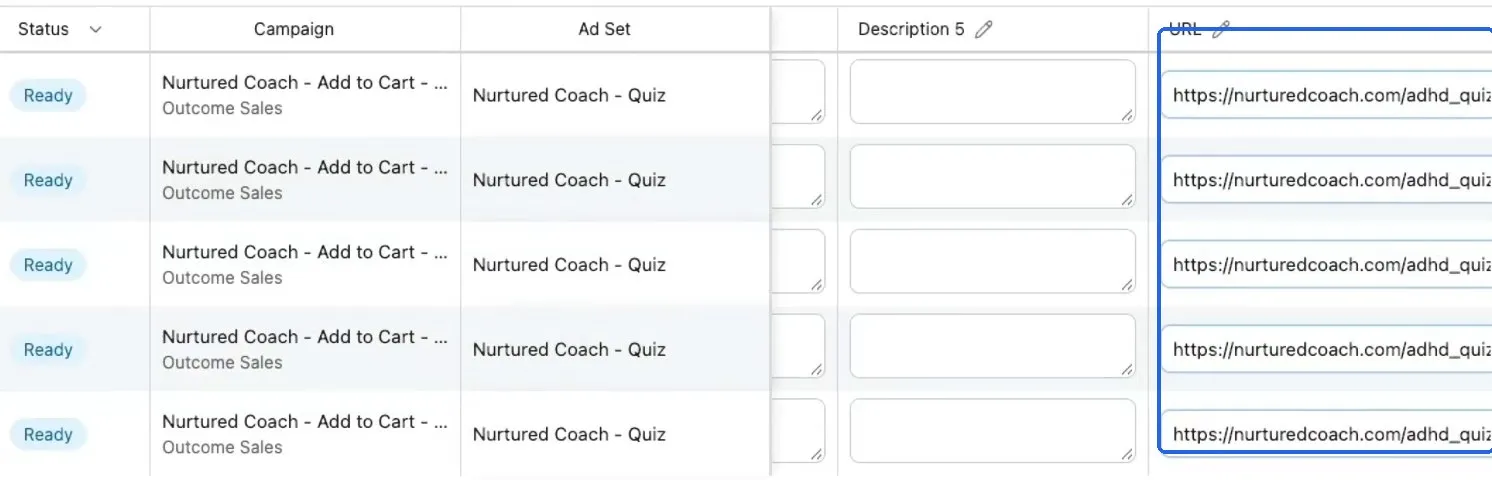
Every row now has the new link. To change a single ad instead, type straight into its cell.
Applying doesn't touch your live ads yet. AdManage tells you to click Publish Changes to push them live, or you can schedule them, which is the next step.
3. Save a draft and schedule it for Friday
The client said Friday, so don't publish now.
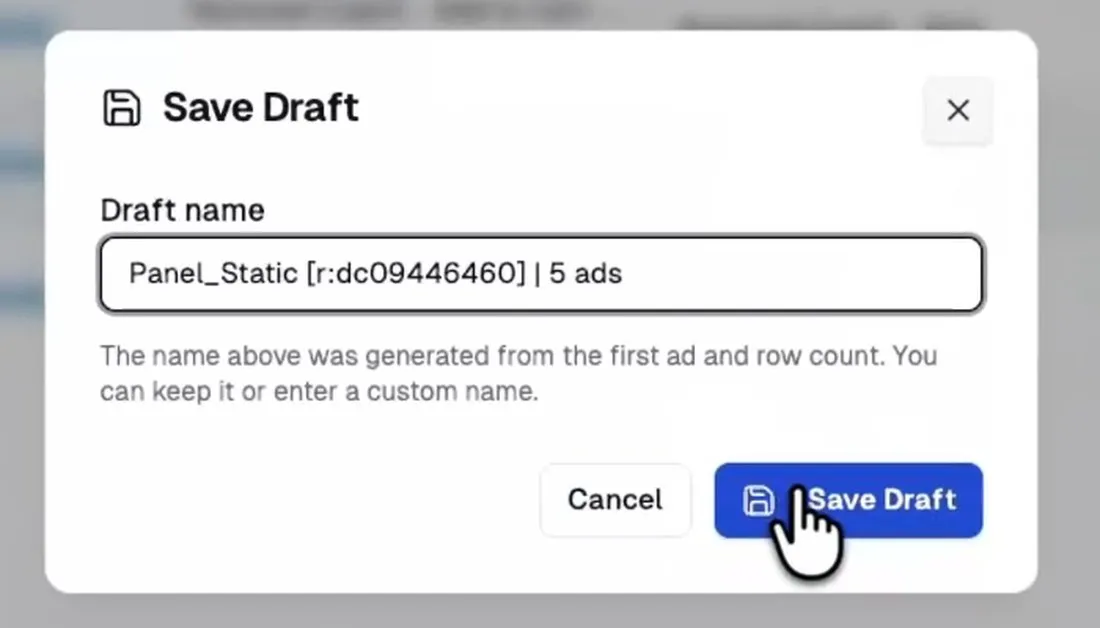
Save Draft keeps your edits under a name, which AdManage generates from the first ad and the row count. You can keep it or type your own.
Then choose Schedule Launch, and pick the date and time. The dialog shows the timezone and spells out the exact launch moment.
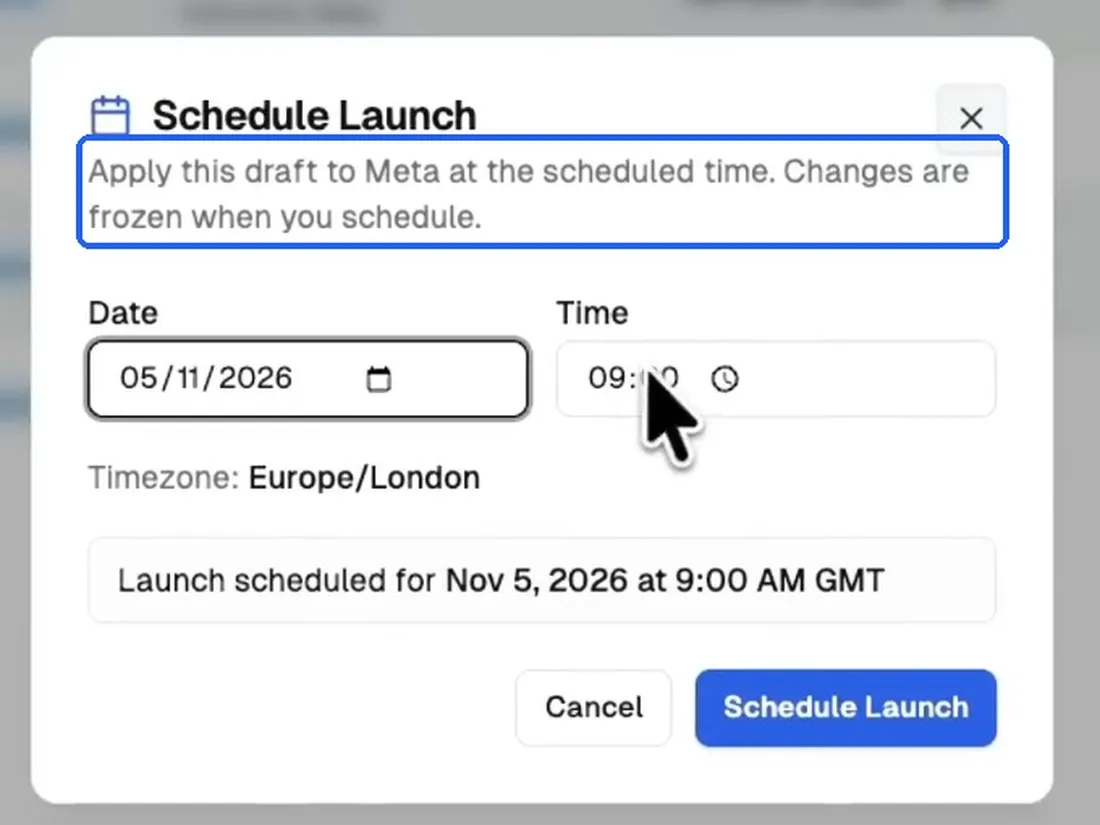
The note at the top is the important part: the draft is applied to Meta at the scheduled time, and changes are frozen when you schedule. What you reviewed is what goes out, so you can close your laptop.
4. Swap creatives on live ads
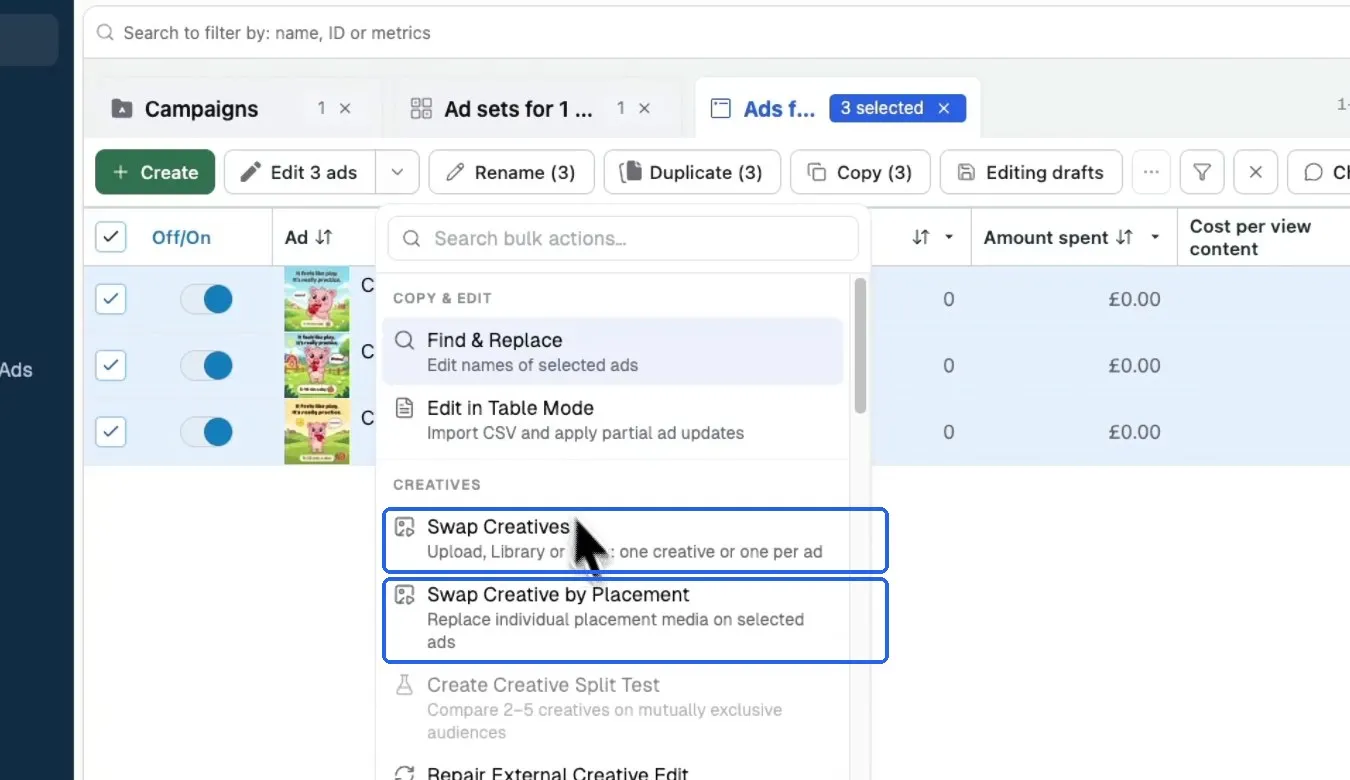
Where: select your ads, bulk actions arrow, Swap Creatives
Use this when a client sends new creative for ads that are already running.
You can bring in the new creative three ways: From Media Library, Google Drive link or Upload files. Use one creative for all the selected ads, or assign one per ad.
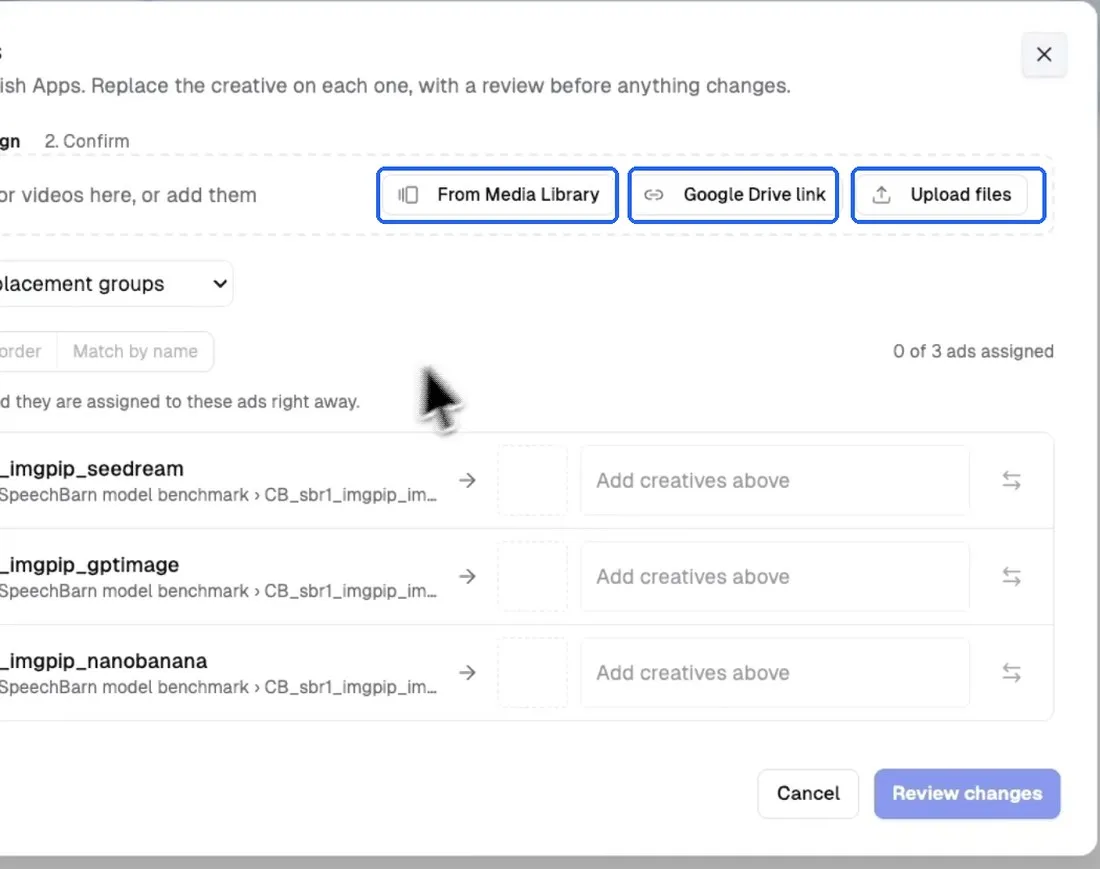
Click Review changes and you get a before and after for each ad, so you can check it before anything changes. Then confirm.
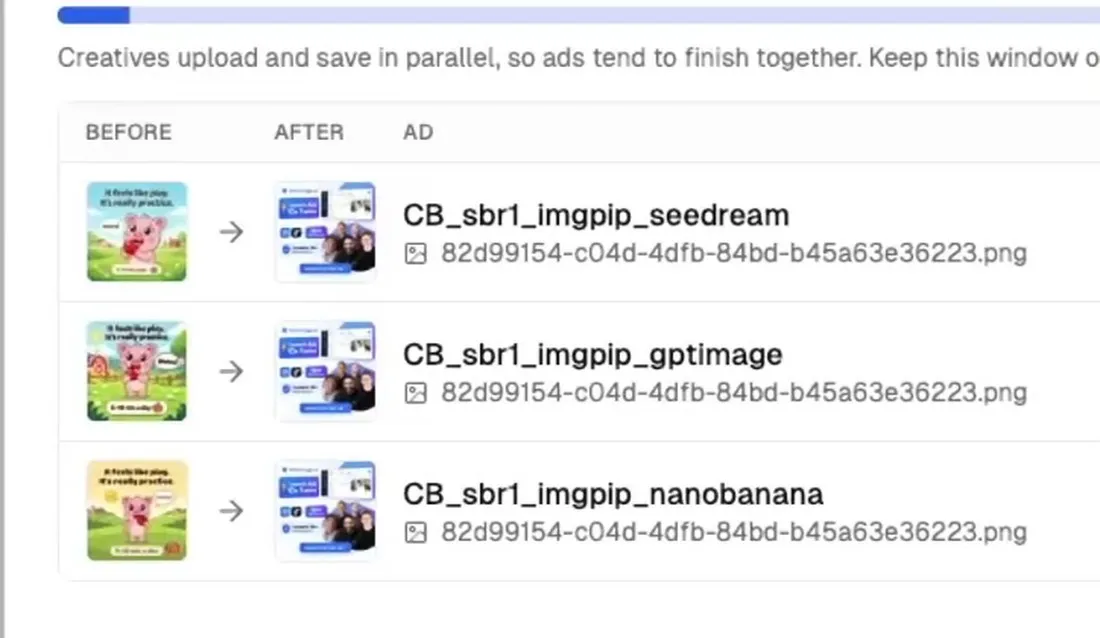
To change only one placement, choose Swap Creative by Placement from the same menu. It replaces the media for individual placements on the selected ads and leaves the rest.
5. Two more in the same menu
The bulk actions menu has plenty more, and its search box finds any of them.
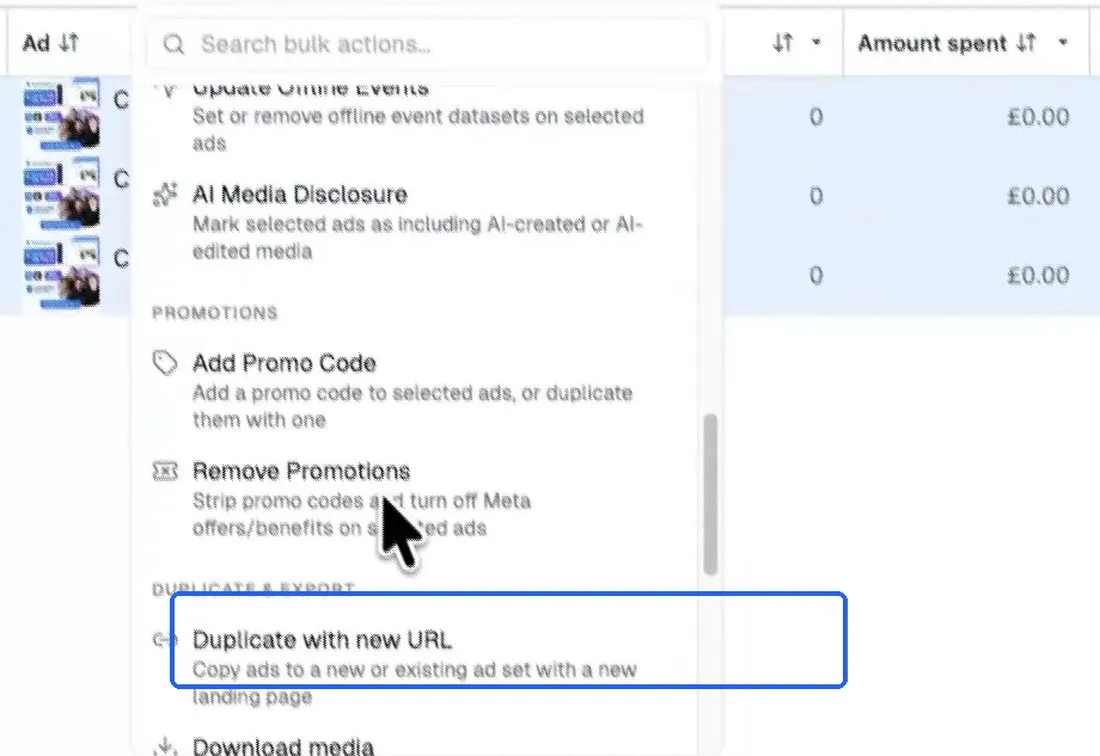
Duplicate with new URL copies your selected ads to a new or existing ad set with a new landing page.
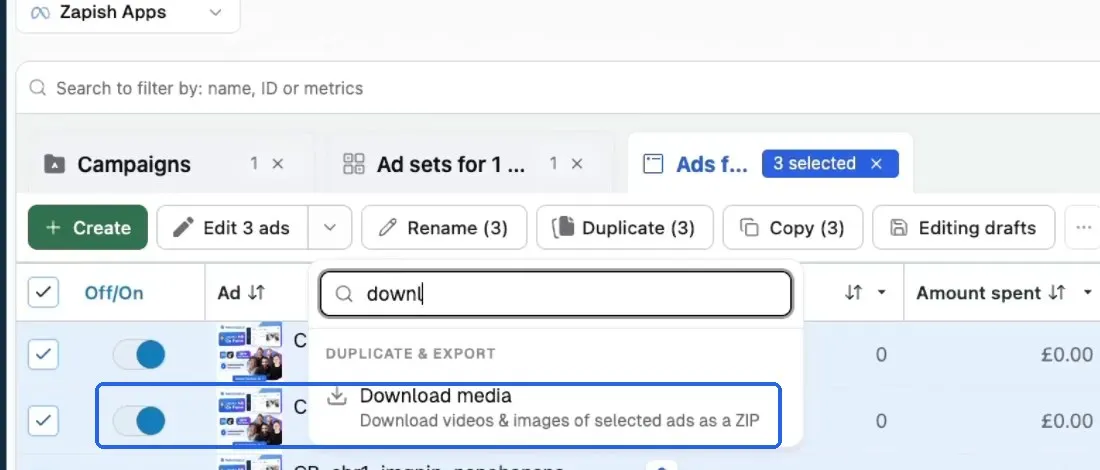
Download media downloads the videos and images of the selected ads as a ZIP.
6. Transfer a campaign to another ad account
Where: Campaigns tab, select a campaign, then the Transfer button in the toolbar.
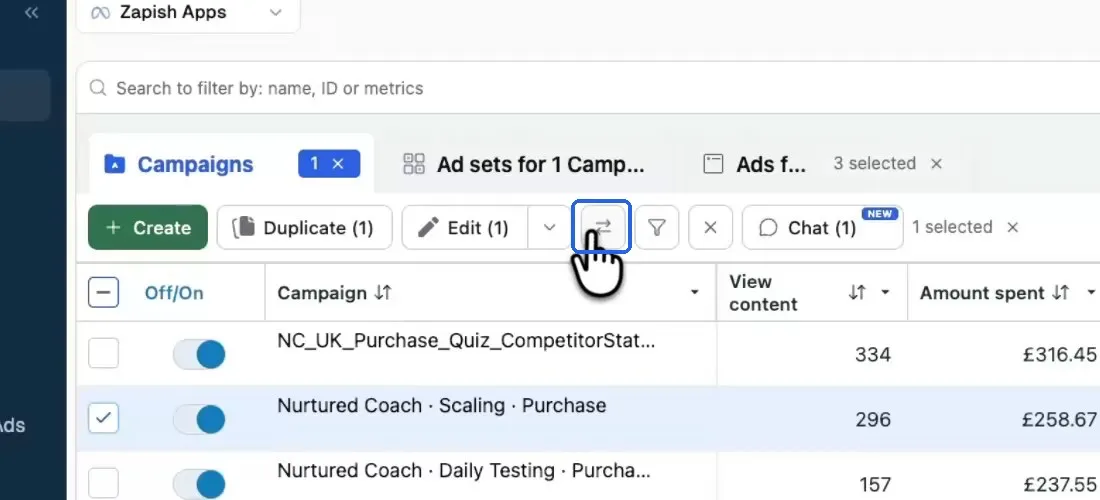
Pick the destination ad account and the destination pixel. You can also choose which ad sets to bring across, and whether they go into a new campaign.
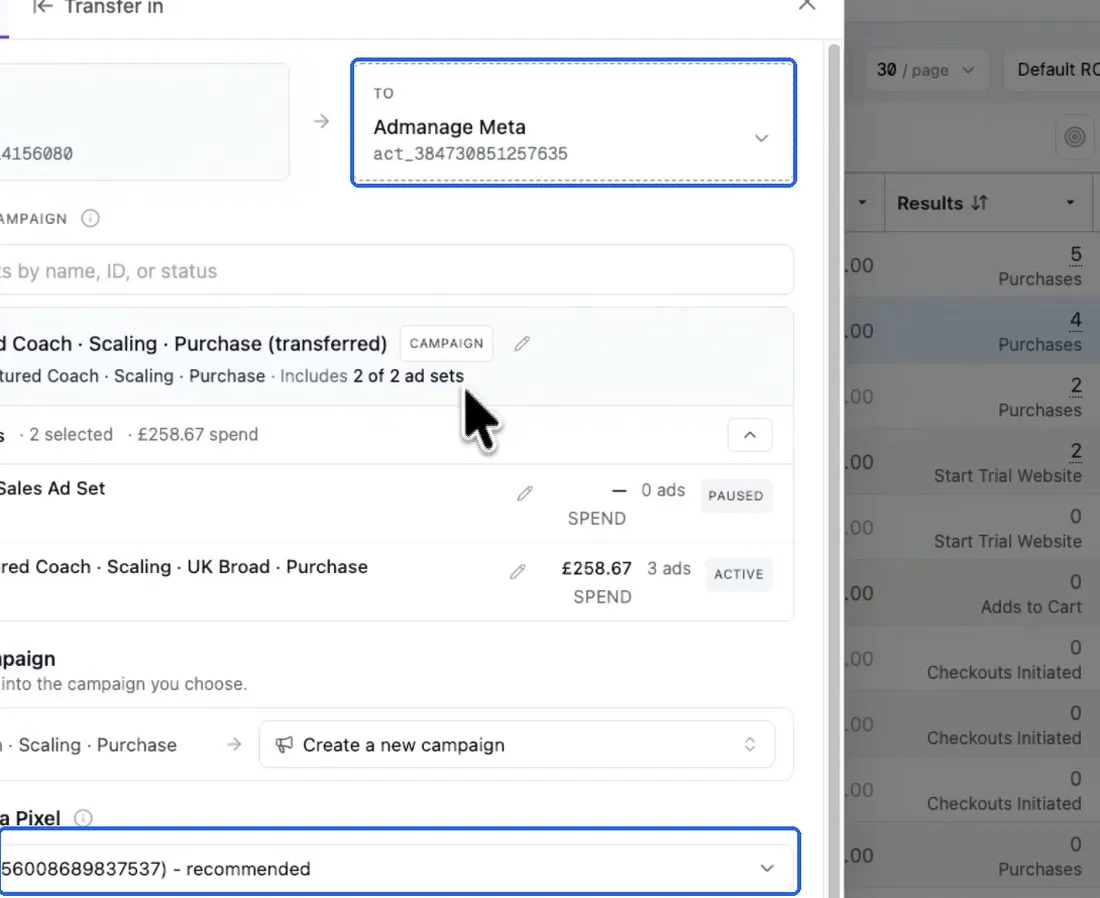
The campaign and selected ad sets are recreated on the destination, and the original stays where it is. Two things to check first: custom audiences are removed, and your Pages and catalogs must be available on the destination account.
Progress shows at the top of the page while you carry on working.
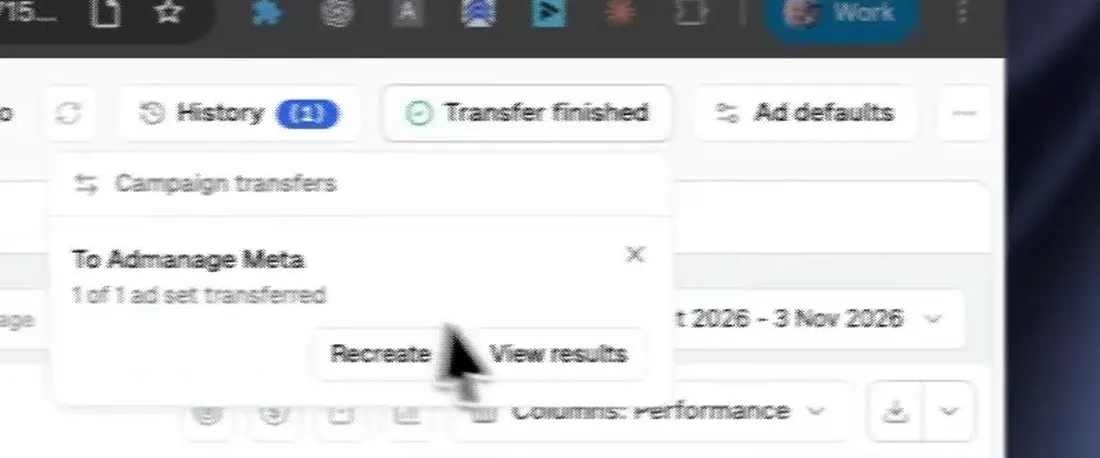
View results shows what was created.
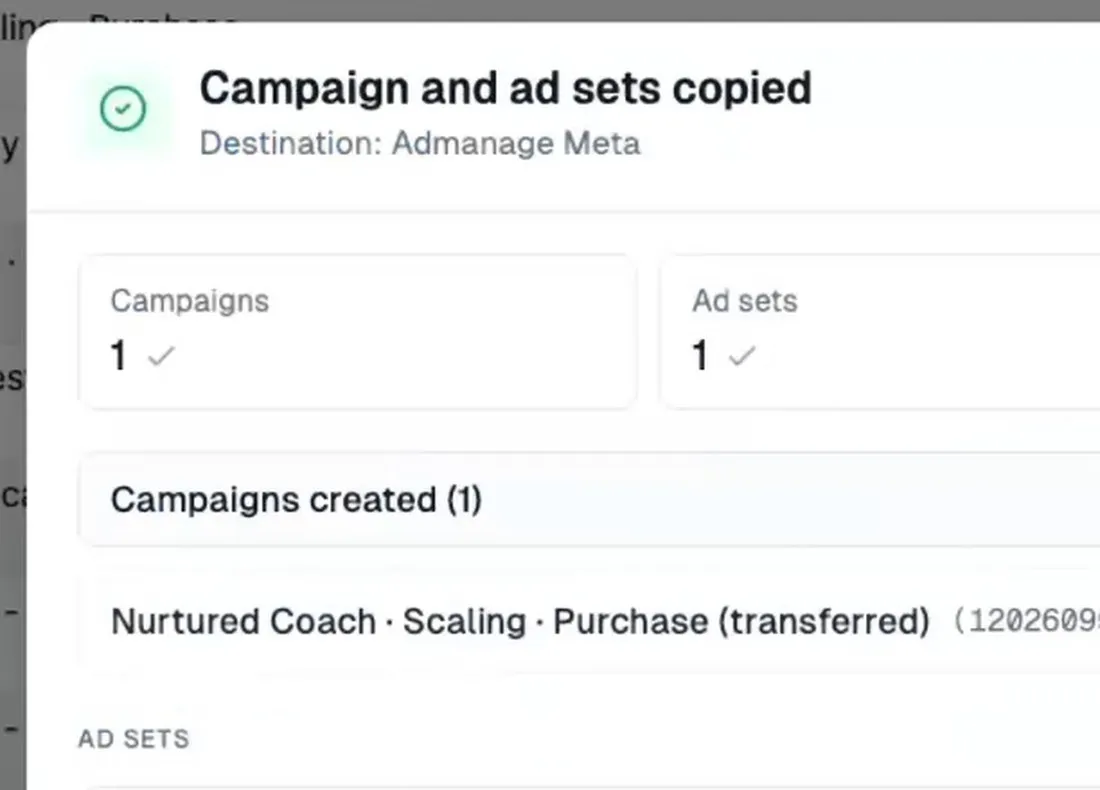
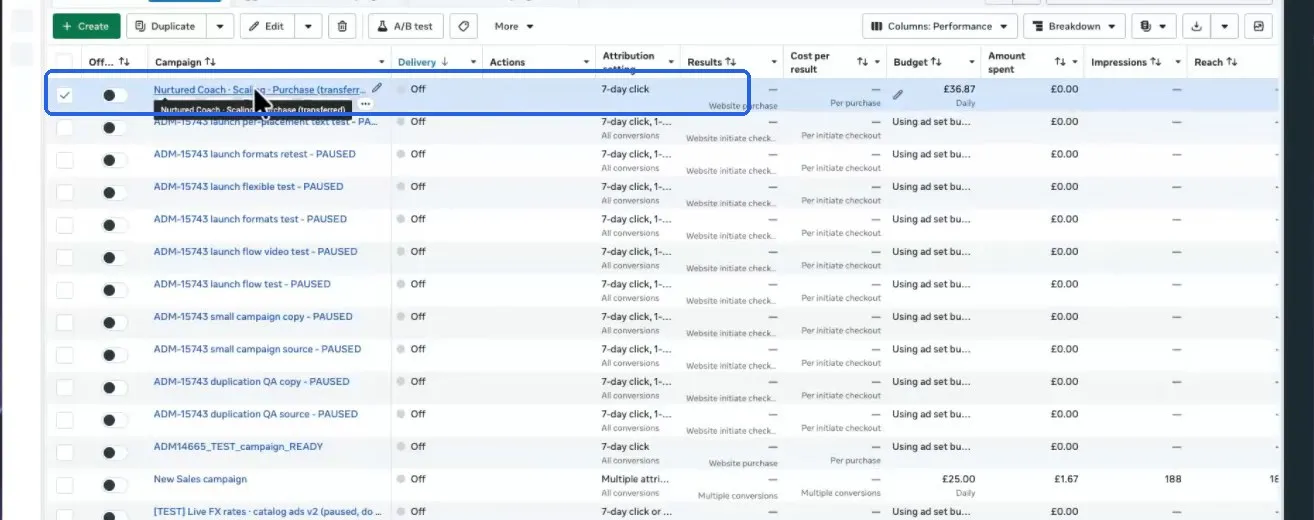
The copy is then in the new ad account in Ads Manager.
Try it
Open Manage from the left-hand rail in AdManage and start with Swap Creatives.

About the author
Cedric Yarish
Co-founder of AdManage.ai